
instruction manual for husqvarna viking sewing machine
Welcome to the comprehensive guide for your Husqvarna Viking sewing machine. This manual serves as your roadmap to understanding setup, features, troubleshooting, and maintenance, ensuring optimal performance.
1.1 Understanding the Importance of the Manual
The Husqvarna Viking sewing machine manual is an essential resource for users to maximize their machine’s potential. It provides detailed guidance on safety precautions, setup, and operation, ensuring safe and effective use. The manual helps users understand the machine’s features, troubleshoot common issues, and perform routine maintenance. By following the manual, users can avoid damage to the machine, improve sewing accuracy, and extend the product’s lifespan. It also serves as a reference for advanced techniques and customization options, making it indispensable for both beginners and experienced sewers. Regularly consulting the manual ensures optimal performance and enhances the overall sewing experience.
1.2 Overview of the Husqvarna Viking Sewing Machine Models
Husqvarna Viking offers a diverse range of sewing machine models, catering to various skill levels and sewing needs. Popular models include the Lily 545, Huskystar 207, and Designer Jade 20, each designed with unique features. The Lily 545 is known for its mechanical simplicity, while the Designer Jade 20 offers advanced embroidery capabilities. The Huskystar 207 excels in quilting and heavy-duty projects. These models vary in stitch options, motor power, and additional features like free-motion sewing and decorative stitching. Whether for beginners or experienced sewers, Husqvarna Viking provides a machine tailored to specific requirements, ensuring versatility and precision in every stitch.
Safety Precautions and Guidelines
Always follow essential safety precautions when using your Husqvarna Viking sewing machine. Unplug it after use, avoid damaged cords, and keep it attended. Use only recommended attachments and ensure proper ventilation to prevent accidents and maintain optimal performance.
2.1 General Safety Instructions for Sewing Machines
Safety is crucial when operating your Husqvarna Viking sewing machine. Always unplug the machine when not in use or during maintenance. Avoid using damaged cords or plugs, as they pose a significant risk. Keep children and pets away while sewing, and never leave the machine unattended. Use only attachments and accessories recommended by the manufacturer to prevent accidents. Ensure proper ventilation and avoid sewing near flammable materials. Follow all instructions provided in the manual, and comply with safety standards such as IEC/EN 60335-2-28 and UL1594. Regularly inspect the machine for wear and tear to maintain safe operation.
2.2 Electrical Safety Tips
Ensure electrical safety by following these guidelines. Always unplug the machine after use or during maintenance to prevent accidents. Never operate the sewing machine with a damaged cord or plug, as this can lead to electrical hazards. Keep the machine away from water and moisture to avoid short circuits. Use only the power source specified in the manual, and avoid overloading outlets. Regularly inspect the cord for signs of wear or damage. Adhere to international safety standards such as IEC/EN 60335-2-28 and UL1594 for safe operation. Never leave the machine unattended while plugged in, especially near children or pets.
2.3 Precautions for Specific Husqvarna Viking Models
Certain Husqvarna Viking models require special attention. For the Designer SE, ensure Free Motion mode is deactivated before adjusting the presser foot. Models like the Emerald 116 and Lily 545 may have sensitive embroidery units, so avoid using non-recommended attachments. Always switch the machine off during needle changes or bobbin adjustments to prevent accidents. For advanced models with specialized features, like the Designer Diamond, refer to the manual for specific guidelines on embroidery or quilting settings. Regularly inspect cords and plugs for wear, and avoid overloading electrical outlets. Adhere to model-specific safety guidelines to ensure optimal performance and longevity of your machine.
Setting Up Your Husqvarna Viking Sewing Machine
Start by carefully unboxing and inspecting your machine. Place it on a stable, flat surface to ensure even operation. Plug in the power cord and test the controls to confirm proper function before beginning your first project.
3.1 Unboxing and Initial Setup
Begin by carefully unboxing your Husqvarna Viking sewing machine. Inspect the machine and accessories, ensuring all components are included and undamaged. Locate the power cord, presser feet, and additional attachments. Place the machine on a sturdy, flat surface, away from direct sunlight and moisture. Before plugging in, review the safety guidelines in the manual. Familiarize yourself with the control panel and basic functions. Ensure the machine is set to the correct voltage for your region. If included, install any optional accessories according to the provided instructions. This initial setup ensures a smooth start to your sewing experience.
3.2 Placing the Machine on a Stable Surface
Position your Husqvarna Viking sewing machine on a sturdy, flat, and even surface to ensure smooth operation. Avoid unstable or uneven surfaces, as they may cause vibration or imbalance. Choose a dedicated sewing area away from direct sunlight, moisture, and dust. Ensure the surface is large enough to accommodate the machine and its accessories comfortably. Keep the machine out of reach of children and pets to prevent accidental damage or injury. For optimal stability, consider using a sewing table or cabinet designed for sewing machines. A stable setup enhances safety, reduces vibration, and improves the quality of your sewing projects.
3.3 Plugging In and Powering On
Before powering on your Husqvarna Viking sewing machine, ensure the power cord is undamaged and properly connected to a grounded electrical outlet. Avoid using extension cords or overloaded circuits. Plug the machine directly into a 120V AC outlet, as specified in the manual. Once plugged in, locate the power switch, typically found on the right side or front of the machine. Gently press the switch to turn it on. You may hear a slight hum as the machine initializes. Always unplug the machine when not in use to ensure safety and prevent electrical issues. Keep the power cord away from heat sources or sharp objects.
Features of the Husqvarna Viking Sewing Machine
The Husqvarna Viking sewing machine features versatile stitching options, user-friendly controls, and customizable settings. It offers advanced embroidery capabilities and a wide range of decorative stitching options.
4.1 Overview of Basic and Advanced Features
The Husqvarna Viking sewing machine offers a wide range of features designed to cater to both beginners and experienced sewists. Basic features include straight and zigzag stitching, adjustable stitch length and width, and a free-arm option for sewing cuffs and sleeves. Advanced features include programmable stitches, memory storage for custom stitch patterns, and a large LCD display for easy navigation. Additionally, many models come with embroidery capabilities, allowing users to create intricate designs. The machine also supports importing custom embroidery designs via USB, making it versatile for various sewing and embroidery projects. These features ensure versatility and precision for all sewing needs.
4.2 Stitch Options and Customization
The Husqvarna Viking sewing machine boasts an extensive array of stitch options, including straight, zigzag, and decorative stitches, catering to various sewing needs. Users can customize stitches by adjusting length, width, and tension to achieve desired results. Advanced models offer programmable stitches, allowing users to save personalized settings for future projects. Additionally, many machines feature a memory function, enabling the storage of custom stitch patterns. Some models also support importing embroidery designs via USB, further enhancing creativity. With these features, sewists can tailor their projects to suit individual preferences, making the machine versatile for both simple and intricate sewing tasks.
4.3 Specialized Features for Embroidery and Quilting
Husqvarna Viking sewing machines offer advanced features tailored for embroidery and quilting. Many models include large embroidery hoops and touch-screen displays for designing and editing patterns directly on the machine. Automatic threaders and cutters streamline the embroidery process, saving time. For quilting, features like large workspaces, even feed mechanisms, and laser-guided stitching ensure precise control over fabric. Some models also include specialized quilting stitches and customizable patterns, allowing for intricate designs. These machines often come with a variety of built-in embroidery designs, making them ideal for both hobbyists and professionals seeking to create stunning quilts and embroidered projects with ease and precision.
Threading and Basic Operations
This section provides a step-by-step guide on threading your Husqvarna Viking sewing machine and performing basic operations. Learn how to properly load the bobbin and start sewing effortlessly.
5.1 Step-by-Step Threading Guide
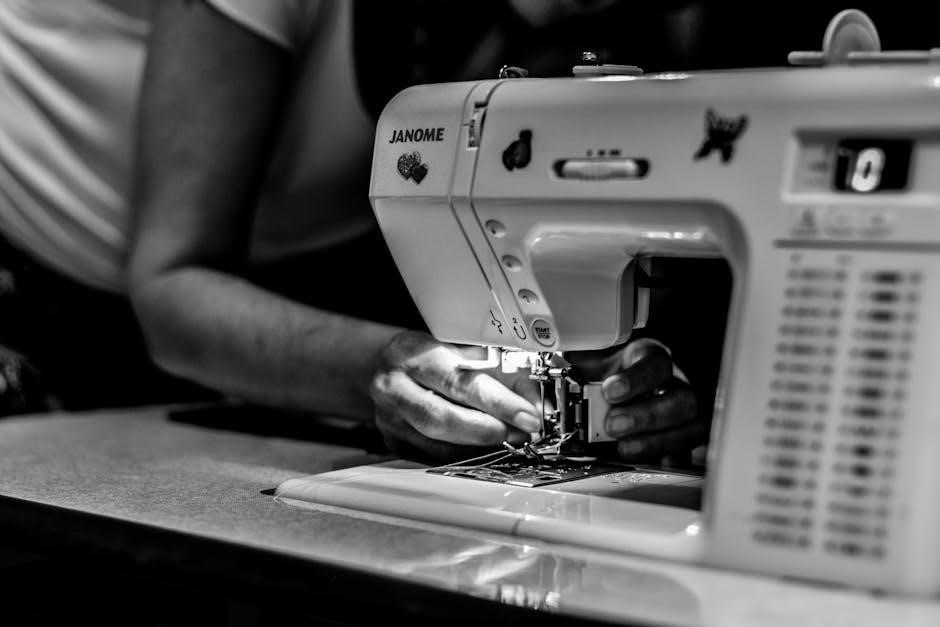
Proper threading is essential for smooth operation. Start by turning off the machine and locating the spool pin. Guide the thread through the tension disc, ensuring it clicks into place. Gently pull the thread to remove any slack. Next, thread through the take-up lever and then the needle. For the bobbin, wind the thread around the bobbin winder, cut it, and insert the bobbin into its case. Pull the bobbin thread slightly to set the tension. Always refer to your specific model’s diagram for accurate threading paths, as variations may exist between Husqvarna Viking models like the Designer SE or Emerald 116.
5.2 Loading the Bobbin
Loading the bobbin correctly ensures proper stitching. Turn off the machine and locate the bobbin case. Wind thread around the bobbin, leaving a small tail. Insert the bobbin into the case, ensuring it sits evenly. Pull the tail gently to set tension. For front-loading models, open the compartment and align the bobbin, then close securely. Some models, like the Designer SE, may require specific alignment. Always check your model’s diagram for precise instructions, as loading methods may vary slightly between Husqvarna Viking machines like the Emerald 116 or Lily 545. Proper loading prevents thread issues during sewing.
5.3 Starting Your First Sewing Project
Begin by ensuring the machine is properly threaded and the bobbin is loaded. Place your fabric under the presser foot, aligning the edge with the machine’s guide. Select a straight stitch for beginners. Gently lower the presser foot and start sewing at a slow, steady pace. Keep your fingers clear of the needle and guide the fabric smoothly. Practice on scrap material first to adjust stitch length and tension. Once comfortable, progress to your actual project. Always stop with the needle in the down position to secure the fabric. This ensures a smooth start to your sewing journey with Husqvarna Viking machines.
Troubleshooting Common Issues
Troubleshoot thread breakage by checking tension and needle condition. Address bobbin issues by ensuring proper loading and alignment. Resolve jams by clearing debris and rethreading the machine carefully.
6.1 Diagnosing Thread Breakage
Thread breakage can occur due to improper threading, incorrect tension, or a dull needle. Always check the thread path for tangles and ensure the needle is in good condition. Verify that the bobbin is correctly seated and that the upper thread tension is not too tight. Using low-quality thread or the wrong type for your fabric can also cause frequent breaks. To resolve, rethread the machine, ensuring the presser foot is up, and test on a scrap fabric. If issues persist, consult the manual or contact authorized support for further assistance.
6.2 Solving Bobbin Tension Problems
Bobbin tension issues can cause uneven stitching or fabric bunching. Check if the bobbin is properly seated and aligned in its case. Ensure the bobbin thread is not tangled or knotted. If tension is too tight, gently loosen the small screw on the bobbin case. If too loose, tighten it slightly. Test by pulling the thread gently; it should offer resistance but move freely. For persistent issues, clean the bobbin area or replace the bobbin case if damaged. Always refer to your manual for specific adjustments, as improper tension can damage the machine or affect stitch quality.
6.3 Addressing Machine Jamming
Machine jamming can occur due to tangled threads, improper fabric feeding, or damaged needles. Turn off the machine and unplug it for safety. Gently remove the fabric and any loose threads. Check for debris in the needle area and bobbin case. Replace the needle if bent or damaged. Ensure fabric is placed smoothly under the presser foot. If the issue persists, consult your manual for specific troubleshooting steps. Regular cleaning and proper thread guidance can help prevent jams. Always handle the machine carefully to avoid further damage and maintain smooth operation.
Maintenance and Care Tips
Regularly clean the machine, lubricate moving parts, and replace needles to ensure optimal performance. Store the machine in a dry, cool place to prevent damage and rust.
7.1 Regular Cleaning and Lubrication
Regular cleaning and lubrication are essential for maintaining your Husqvarna Viking sewing machine. Turn off and unplug the machine before cleaning. Use a soft-bristled brush to remove lint and debris from the bobbin area, feed dogs, and stitch plate. For lubrication, apply a few drops of sewing machine oil to moving parts, such as the hook race and shuttle. Avoid over-lubricating to prevent attracting dust. Clean and lubricate after every project or as needed to ensure smooth operation. Regular maintenance prevents mechanical issues and extends the machine’s lifespan, keeping it in optimal working condition for years to come. Consistency is key.
7.2 Replacing Needles and Other Parts
Replacing needles and other parts on your Husqvarna Viking sewing machine is crucial for maintaining performance. Needles should be replaced when they show signs of wear, such as bending or dullness. Turn off and unplug the machine before replacing any parts. To replace the needle, lift the needle clamp screw, remove the old needle, and insert the new one, ensuring it’s securely fastened. For other parts, like the bobbin case or feed dogs, refer to the manual for specific instructions. Always use genuine Husqvarna Viking parts to ensure compatibility and proper function. Regular replacement prevents damage and ensures consistent stitching quality over time.
7.3 Storing the Machine Properly
Proper storage is essential to maintain your Husqvarna Viking sewing machine’s performance and longevity. Always clean the machine thoroughly before storing it, removing any debris or residual thread. Use a soft, dry cloth to wipe down surfaces and protect against dust. Store the machine in a cool, dry place away from direct sunlight and moisture. Consider using a protective cover or case to prevent dust accumulation. If storing for an extended period, ensure the machine is unplugged and all accessories are securely packed. Regularly check for software updates before storing to ensure optimal functionality when you resume use. Proper storage ensures your machine remains in excellent condition for future projects.
Advanced Sewing Techniques
Master advanced techniques like free-motion sewing and decorative stitching to enhance your projects. Explore specialized methods for various fabrics and elevate your sewing skills creatively.
8.1 Mastering Free-Motion Sewing
Free-motion sewing allows for creative stitching without feed dogs. Engage the free-motion mode on your Husqvarna Viking machine, lower the presser foot, and gently guide fabric for intricate designs. Use a darning foot or Teflon foot for smooth movement. Start with slow, steady motions, adjusting stitch length and width as needed. Practice on scrap fabric to build confidence. This technique is ideal for quilting, embroidery, and custom patterns, enabling precise control over every stitch. Regularly check thread tension to ensure even stitching and avoid fabric bunching. Mastering free-motion sewing opens up endless possibilities for artistic expression in your projects.
8.2 Using Decorative Stitches Effectively
Decorative stitches on your Husqvarna Viking sewing machine can elevate your projects. Start by exploring the various stitches available, such as satin, blind hem, or floral patterns. Each stitch serves a unique purpose, like the satin stitch for dense lines or the blind hem for invisible seams. Select the desired stitch using your machine’s interface, adjusting stitch length and width as needed. Consider using specialized presser feet for smoother fabric movement. Experiment with contrasting threads for visibility and ensure proper tension to avoid loose or tight stitches. Practice on scrap fabric to test settings and thread types, and plan designs before sewing. Combining stitches can add visual interest, and adjusting speed and fabric type settings will enhance results. Regular machine maintenance and using appropriate accessories can further improve outcomes.
8.3 Sewing Different Fabric Types
Your Husqvarna Viking sewing machine is versatile for various fabrics. For cotton and linen, use a sharp needle and standard settings. Silk and delicate fabrics require a fine needle and reduced tension. Denim and heavy fabrics benefit from a heavy-duty needle and longer stitch length. Stretch fabrics like knits work best with a stretch or zigzag stitch. Always test fabric scraps to adjust settings. Use the appropriate presser foot for smooth feeding, such as the walking foot for thick layers. Match thread weight to fabric thickness for balanced stitching. Proper fabric handling ensures professional results across all material types. Adjusting stitch length and tension enhances accuracy.
Understanding the Manual’s Structure
This manual is organized into clear sections, starting with setup and safety, followed by features, operations, troubleshooting, and maintenance. Each chapter is designed to guide you logically, ensuring easy navigation and quick access to specific information. Symbols and diagrams are included to simplify complex steps, while the table of contents provides a roadmap for locating topics efficiently. This structure helps users of all skill levels master their Husqvarna Viking sewing machine with confidence and precision. Regular updates ensure the manual stays relevant and comprehensive. Detailed instructions and visual aids enhance learning and problem-solving.
9.1 Navigating the Table of Contents
The table of contents is your gateway to quickly locating specific information within the manual. Organized logically, it lists all major sections, such as setup, features, and troubleshooting, with sub-sections for detailed topics. Each chapter is clearly labeled, making it easy to find guidance on threading, maintenance, or advanced techniques. Symbols and formatting help distinguish different types of information, while page numbers or hyperlinks direct you instantly to the relevant sections. Whether you’re a beginner or an experienced user, the table of contents ensures you can navigate the manual intuitively, saving time and enhancing your overall experience with the Husqvarna Viking sewing machine.
9.2 Interpreting Symbols and Diagrams
The manual uses symbols and diagrams to simplify complex instructions, ensuring clarity for all users. Symbols like thread direction arrows, power buttons, and stitch indicators are standardized, while diagrams provide visual guidance for tasks such as threading, bobbin installation, and presser foot attachment. Color-coded elements highlight specific parts, making it easier to follow along. Diagrams often accompany step-by-step instructions, illustrating processes like adjusting tension or troubleshooting common issues. These visual aids are particularly helpful for understanding mechanical operations and advanced features. By referencing the key of symbols provided in the manual, you can quickly decode and apply the information, enhancing your sewing experience. Detailed illustrations also assist in identifying machine components and their functions, ensuring safe and effective operation. Whether you’re assembling the machine or performing maintenance, these visual tools are indispensable for mastering your Husqvarna Viking sewing machine.
9.3 Finding Specific Information Quickly
The manual is designed with a clear structure to help you locate information efficiently. Use the table of contents to navigate through sections by topic. For quick reference, the index lists key terms alphabetically, allowing you to find specific features or troubleshooting tips rapidly. Many manuals also include a search function in digital formats, enabling instant access to relevant pages. Additionally, sections are often divided into subcategories with clear headings, making it easier to pinpoint instructions for tasks like threading or adjusting tension. By utilizing these tools, you can save time and focus on mastering your Husqvarna Viking sewing machine.
Mastering your Husqvarna Viking sewing machine begins with understanding its manual. Practice regularly, explore advanced features, and refer to online resources for continued growth and troubleshooting support.
10.1 Recap of Key Points
This manual has guided you through essential steps for using your Husqvarna Viking sewing machine, from safety tips to advanced techniques. It emphasized proper setup, threading, and feature exploration to maximize functionality. Troubleshooting common issues and regular maintenance were highlighted to ensure longevity and performance. By following these guidelines, you can confidently operate your machine, tackle various projects, and enhance your sewing skills. Remember to explore additional resources for further learning and support to continue mastering your Husqvarna Viking sewing machine.
10.2 Encouragement to Practice
Practice is key to mastering your Husqvarna Viking sewing machine. Start with simple projects to build confidence and gradually explore more complex techniques. Regular use will help you familiarize yourself with the machine’s features and capabilities. Experiment with different fabrics and stitches to discover what works best for you. Don’t hesitate to try new patterns or embroidery designs—each project is an opportunity to learn and improve. Remember, consistent practice will enhance your sewing skills and unlock the full potential of your machine. Keep creating, and enjoy the satisfaction of crafting something truly unique with your Husqvarna Viking.
10.3 Resources for Further Learning
For continued growth, explore additional resources like online tutorials, sewing blogs, and workshops. Visit the official Husqvarna Viking website for updated guides, webinars, and FAQs. Join sewing communities and forums to connect with experienced users and gain tips. YouTube channels and crafting platforms offer step-by-step videos for advanced techniques. Local sewing classes can also provide hands-on instruction. Utilize the manual’s troubleshooting section for quick solutions. Lastly, consider purchasing sewing books or pattern guides to expand your creative possibilities. These resources will help you refine your skills and unlock new possibilities with your Husqvarna Viking sewing machine;
Related Posts

da lite projector screen manual
Need a reliable manual pull-down projector screen? Explore Da-Lite’s range at JointStuff.com – quality, durability & the perfect viewing experience!

tiffin motorhomes service manuals pdf free download
Need a Tiffin Motorhome service manual? Download PDF versions for free! Troubleshooting, maintenance & repair guides at your fingertips. Easy access & instant download!
compete usa manual
Need Compete USA manuals? JointStuff has you covered! Find detailed guides, resources & everything you need to succeed. Explore now – it’s a game changer!